Garden paths solve several problems at once – they make walking and transporting mechanized equipment easier, divide the space into zones and decorate it. However, you can pave them yourself in most cases, and you have to choose the necessary material. Therefore, we suggest that you familiarize yourself with the main ways of creating ennobled paths for a private yard!
1. Concrete Slabs Garden Pathway
Strong, durable concrete is a great resource for garden trails. The concrete version is easy to clean, and it is economical, resistant to temperature extremes, and durable. In the finished form, the plates look quite good. Moreover, they can be made in almost any size and configuration. It is also possible to change the shade of the coating by adding the required amount of dyes. Thus, it is not difficult to build such paths yourself.
First, mark the boundaries and dig the bed 10 cm deep. Next, cover it with a 5 cm layer of sand, tamp and pour water over it. Next, mount the wood frames in the bed with a distance of 7 cm between them. The width of the frames should be in direct proportion to the width of the path itself. Finally, fill the frames with concrete.
After 3 days, the concrete slabs will harden. Now the matter remains small – plant grass between the planes or covers the gaps with pebbles.
Surfaces look beautiful and appropriate on areas decorated in a modern, Scandinavian style. A strict and somewhat cold image is combined with glass, plastic, stone, metal.
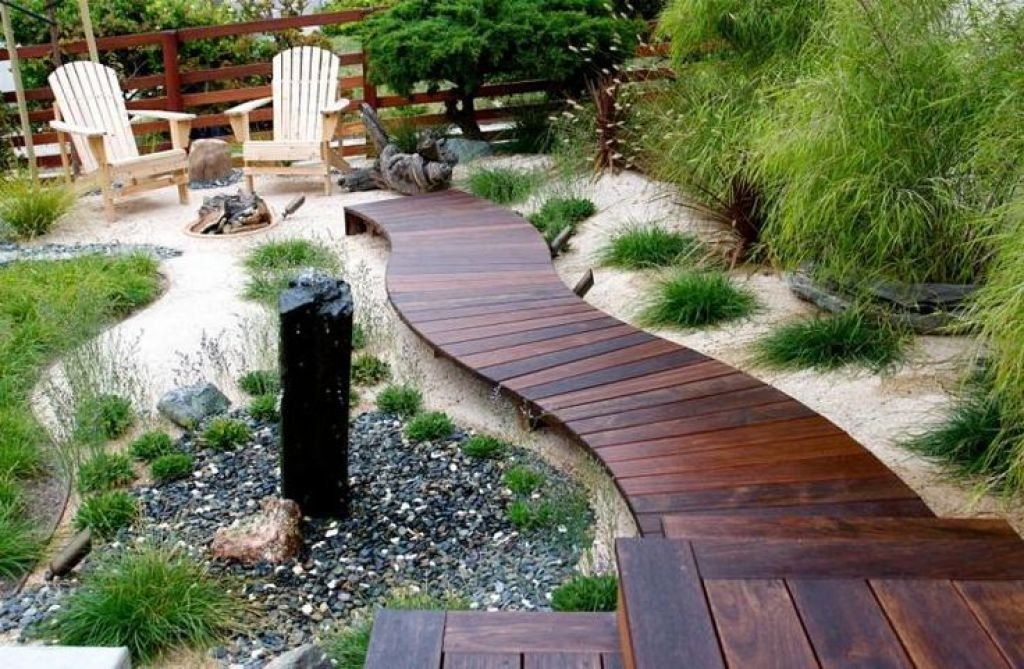
2. Garden Pathway with Boards
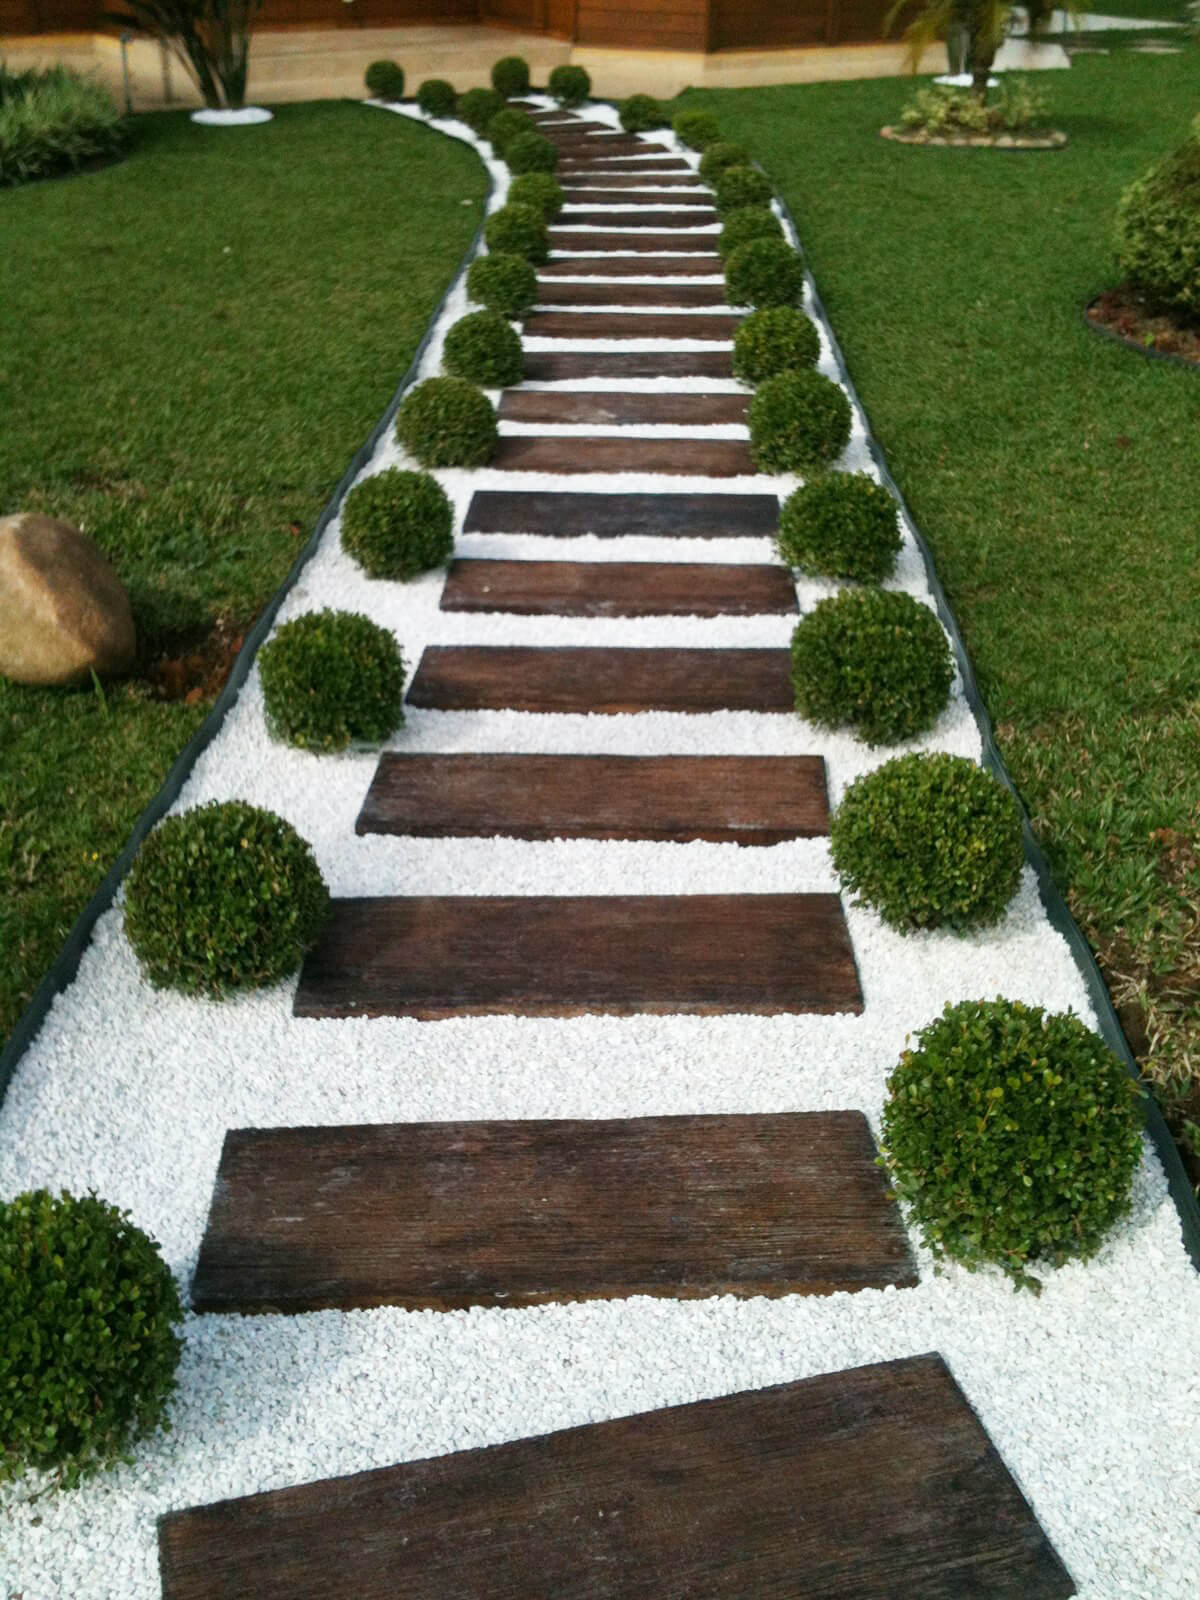
Wood is perfect for landscaping in any form. Wood is a warm natural material that does not overheat in hot weather, and therefore it is pleasant to walk on it even without shoes. Thus, if you are a fan of natural raw materials, feel free to use wood to create a garden path.
In the design process, it is worth paying special attention to the relief. Irrigation spots, deep depressions where liquid can accumulate are not the best for timber. From a technological point of view, they should be placed above the ground line to keep them dry and clean. Make a kind of pillow by laying the frame in the trench, on which you subsequently fix the boards with screws.
For the boardwalk to blend harmoniously into the overall landscape, its dimensions must be proportional to the location. For example, a small area in the garden does not require wide lines. Limit yourself to 50 cm for one person. On the other hand, Central passages should be equipped with spacious routes measuring a meter or more.
3. Wooden Chocks Garden Pathway
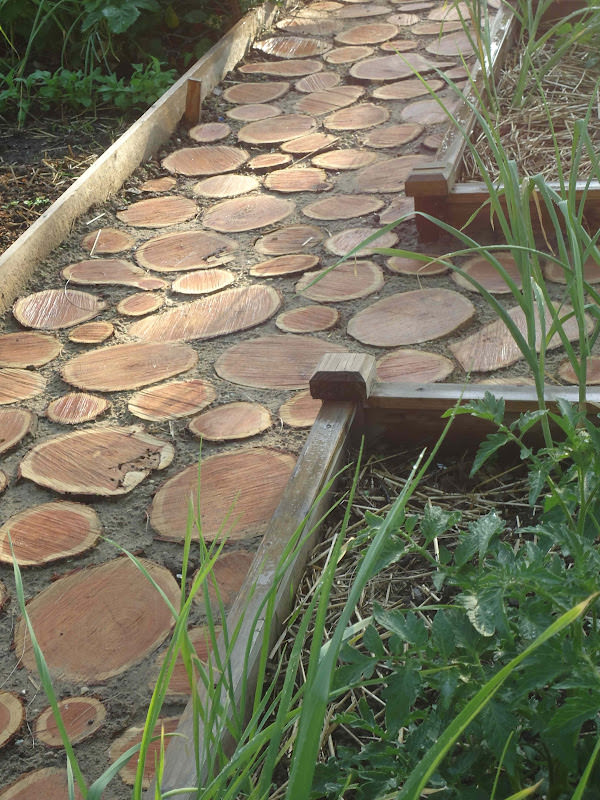
Garden paths made of woodcuts also look non-trivial. Environmentally friendly products have a natural look, low in price, do not form puddles, are repaired, and over time, unusable logs can be crushed and included in compost. But the most significant plus is that a unique path can be quickly and easily built with your own hands.
First, mark the route and mark it with stakes and ropes stretched between them. Next, dig a ditch, which should be 70-80 mm higher than the height of the stumps. Place plastic wrap on the bottom. Then add gravel or crushed stone to half the total height and tamp it well. Fill the remaining space with sand and pour it over to seal.
Next, the cuts themselves are laid out. Lay the logs as you like. Large and small stumps can be alternated. Place them close or far from each other. The most important thing at this stage is to secure them with high quality and level them with a building level.
Finally, fill the space between the discs with the earth with grass seeds, sand, or gravel. Then, treat the wooden parts themselves with an antiseptic cover with paint or drying oil.
4. Curly Shapes Garden Pathway
Using curly shapes is a simple and inexpensive way to arrange a garden path. For a full cycle of independent construction, just one device is enough. Naturally, the slabs are not as strong as factory products made with Vibro casting technology, but for landscape trails with their low load, this is quite the best option.
The frame can be purchased in a specialized store, on an Internet resource, or you can make it yourself from foam or chipboard. The concrete slurry should be relatively common. Place the frame on the ground, fill it with concrete, spread with a trowel, and wait 10-15 minutes for the liquid to harden. Next, remove the mold with a gentle vibration. Repeat the cycle over the entire intended area. Finally, cover the blocks with sand, sprinkle with water and sweep with a stiff brush.
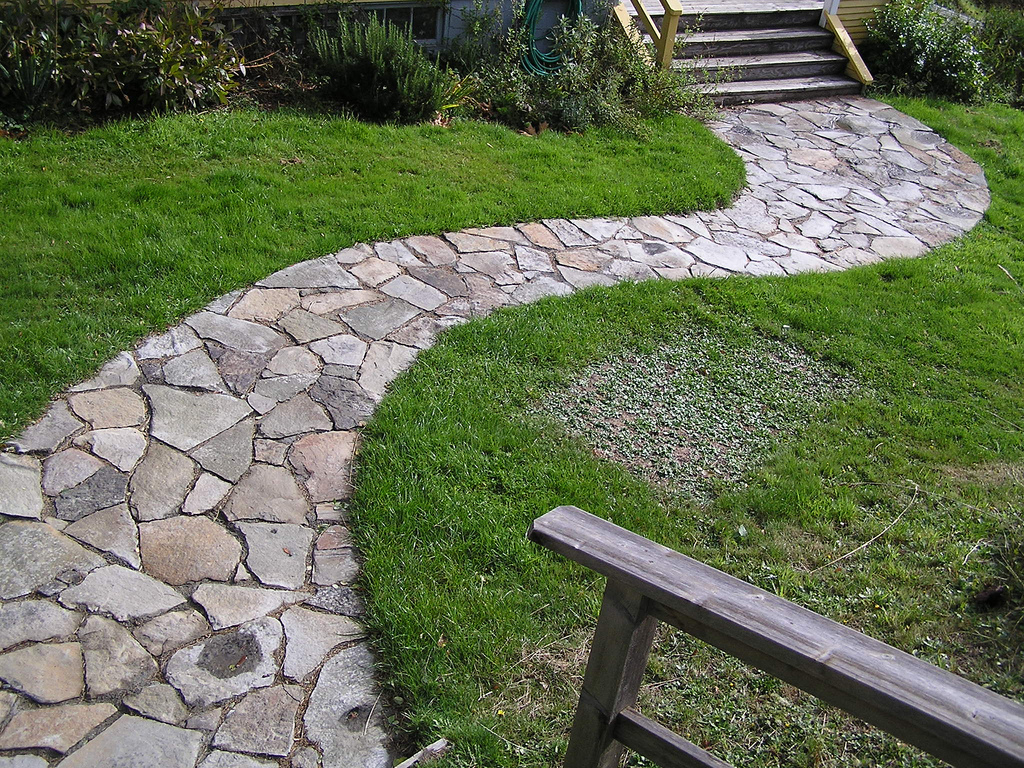
5. Natural Stone Garden Pathway
For many designers, this material seems to be one of the best in its practical and aesthetic characteristics. Indeed, in his surroundings, bushes, trees, flowers, and lawns look very natural. However, for consumers, the advisability of using this product may be questioned only because of the considerable prices and processing difficulties.
The stone is beautiful in its naturalness, so it is better to leave it in its original form. Otherwise, you risk getting an artificial unremarkable result instead of a noble image. Products made from basalt, granite, marble, and limestone slabs are trendy.
There are two main methods of masonry – with or without cement. In any case, it’s worth deciding before starting work. When installing the topcoat, make sure the canvas is several centimeters above ground level. It is important to pay attention to this so that liquid does not accumulate on the finished track.
6. Clinker Paving Stones Garden Pathway
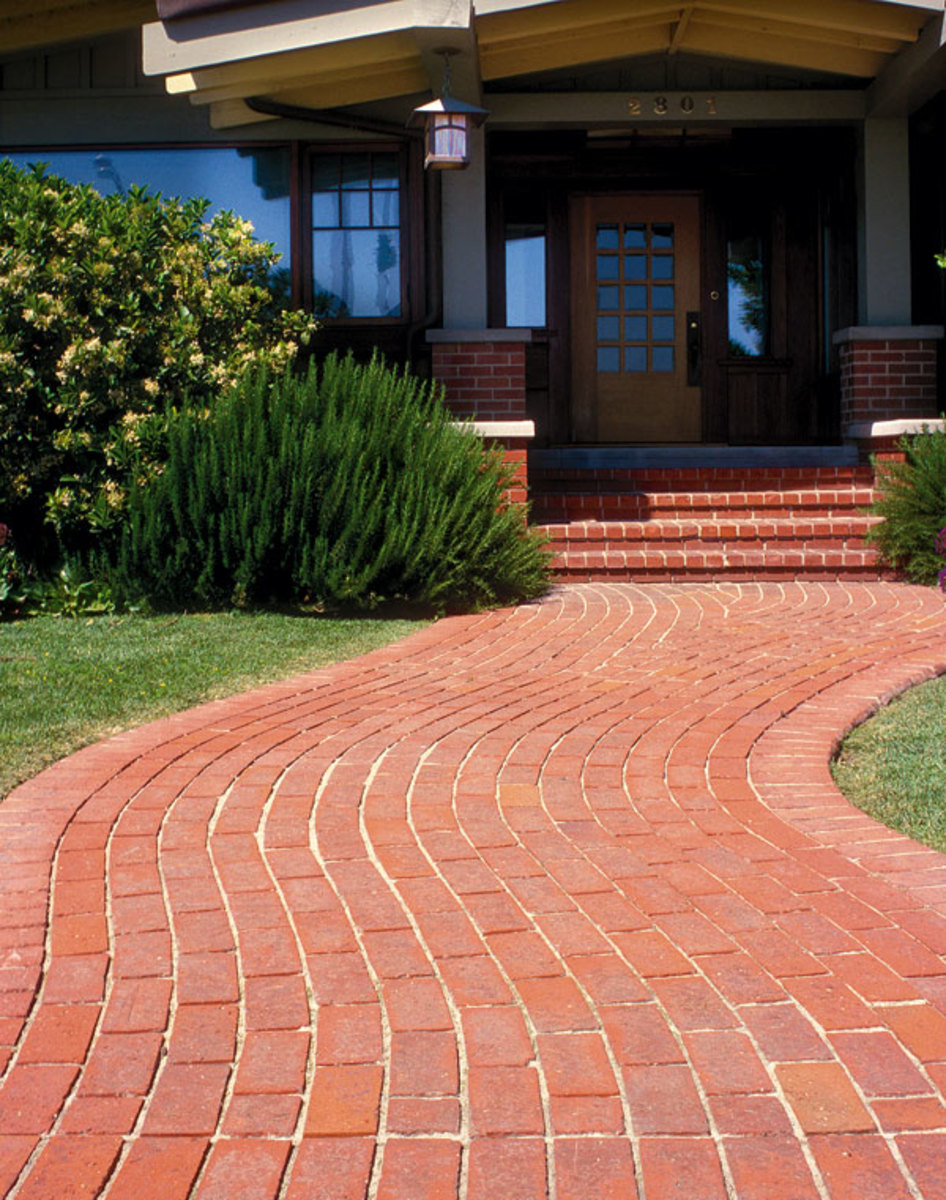
Cobbled sidewalks are resistant to weather conditions, mechanical stress, and wear. Attractive appearance and pleasant color palette, together with low prices, make this material quite competitive in the construction market. In addition, the products are easy to install and use. Acids, salts, and oils do not destroy them, and the shade remains the same for many years.
Among the main groups of shades, the following can be distinguished: brick, yellow, dark, and light – select the desired color to match the rest of the buildings. The texture of the product is also an important factor. Go for a smooth, rough, or decorative one with shiny details. But be careful. Even the texture should overlap with the facade.
You can build a garden path from paving stones without the help of specialists. First, remove the top layer of soil 30-50 cm. A sandy base is sufficient for hiking trails. It is filled up by 10-20 cm, filled with water, and compacted. Next, make a small indentation and set the curb 2-4 mm below the paving stone. Select the installation method and proceed with the laying process itself, leaving small 3-5 mm gaps. In the end, fill the gaps with sand, spread it with a brush, tamp with a vibrating plate and wash the plane with water.
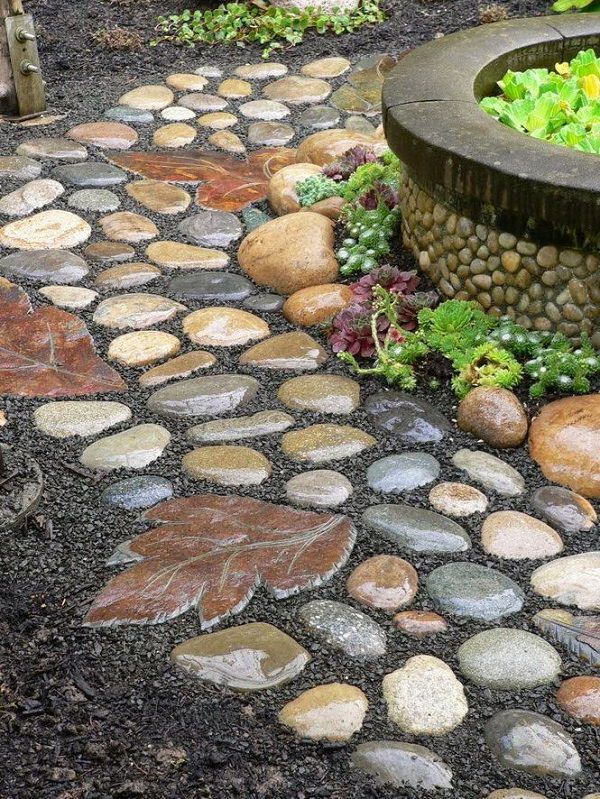
7. Filled Garden Pathway
Landscaping professionals have long used pebbles, gravel, and rubble in their work. Plots in the company of these stones look beautiful and relaxed. At the same time, the paths calmly react to feasible loads in the form of carts and walking. Be sure to pay attention to the bulk variations if your home is decorated in a rustic or Mediterranean style. The country garden will organically complement the paths from the debris of rocks, laid with a continuous canvas, without excessive gloss. In the second case, you can be a little sophisticated and layout a mosaic pebble pattern. Moreover, an alpine slide, beautiful flower beds, or a small body of water go well with this design element.
If you wish, you can build a pebble garden path with your own hands. First, determine the contours with a rope, bearing in mind that their width should be at least 50 cm. Next, remove a layer of soil 15-20 cm, fill in the sand, and then gravel. Fill the moat two-thirds. Place a border around the edges and fill the remaining space with cement, controlling the horizontal orientation with the level. Next, place the pebbles in a wet solution. To lay stones without an ornament, place them vertically or horizontally close to each other, pressing them into the cement. If you want to organize a path with a pattern, create a sketch and start outlining it from the center. To get a flat plane, use a board and a hammer, tapping each area, check the result with a level. After covering the work with foil, leave it for a day, fill the path with liquid cement, and remove excess with a brush. You can use the track for its intended purpose after 15 days.
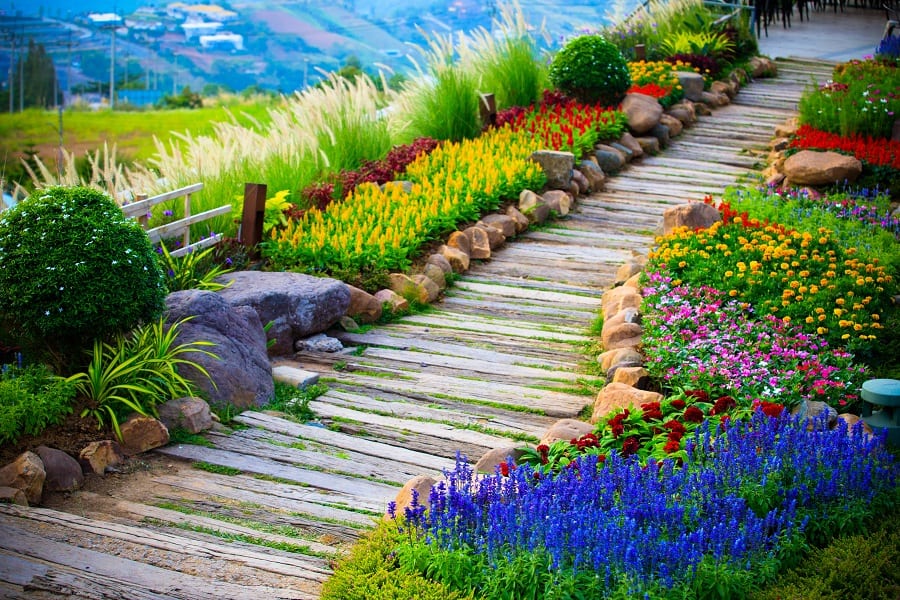
8. Garden Decking Pathway
Garden decking is a relatively new coating for landscaping. Typically, it is a solid or modular platform made of wood or WPC. However, it has already established itself as an aesthetic, convenient, and safe resource. When choosing the floor made of natural wood, give preference to oak species, as they are less prone to decay and wear than conifers.
Laconic configuration is perhaps the main advantage of the material. If you have a solid foundation with drainage, you can line the canvas directly onto the ground. But if the surface has curves and you plan to refine a large space, it makes sense to prepare a base like sand or sand and gravel cushion.